Do you want to learn how to bake a cake from scratch? Are you confused about where to start? Maybe you are afraid to waste time and ingredients trying a bad recipe or something that won’t work?
If you answered, yes, you’ve come to the right place!
My goal is to help you get the baking skills you need without having to run all over the internet to find answers.
This section contains affiliate links, I earn from purchases made through the links here.
If you can read a recipe and have a beginner’s level knowledge in the kitchen, I know I can guide you through learning how to bake a cake from scratch. If you can’t read a recipe, start here, at How to Read a Recipe.
In this article we will cover these topics:
- The benefits of learning how to bake a cake from scratch
- How to gauge a cake recipe’s difficulty
- My best tips for baking a cake from scratch
- Basic tools and equipment
- Nice to have equipment and tools
- Common ingredients in cake recipes and their purpose
If you ONLY need some cake recipes, and you already know how to bake a cake from scratch, this isn’t the right article for you. Head over to my recipes and see if you can find something you’d like to try!
The Benefits of Learning How to Bake a Cake from Scratch
1) Baking your own cake puts you in control of the ingredients!
A few years ago I had never made a cake from scratch. I was a busy teacher and mom of 4 and I used box mixes for almost everything, including cake. That’s just how we baked in my family!
Then I read the label on the box of cake mix:
Sugar, Enriched Bleached Wheat Flour (Flour, Niacin, Reduced Iron, Thiamine Mononitrate, Riboflavin, Folic Acid), Vegetable Oil Shortening (Palm Oil And/Or Partially Hydrogenated Soybean Oil) Leavening (Sodium Bicarbonate, Sodium Aluminum Phosphate, Dicalcium Phosphate, Monocalcium Phosphate, Monocalcium Phosphate Monohydrate), Wheat Starch. Contains 2% Or Less Of: Salt, Propylene Glycol Mono- And Diesters Of Fats And Fatty Acids, Mono- And Diglycerides, Sodium Stearoyl Lactylate, Dextrose, Artificial Flavors, Cellulose Gum, Xanthan Gum, Yellow 5 Lake, Red 40 Lake.
Yikes. I didn’t want to eat 8 of those ingredients or feed them to my family. Still, I needed cakes in my life. Baking my own was one sure way to know what I was eating, so I set out to learn.
2) Baking is a superpower.
Baking from scratch isn’t something a lot of people know how to do. I’ll even venture to say it’s becoming a lost art.
Yes, the shows on tv seem like everyone is doing it, but it’s all hype. Everyone is WATCHING it. Actual baking requires a lot of time and commitment that not many people make.
If you learn how to bake a cake, you will have a new superpower. This power gathers the family around the table and steals the show everywhere you go. This power also makes people ask how much you charge for your services. Beware!
You may need a secret identity after this.

3) Baking satisfies our souls.
In our consumer-based culture, we can go buy anything. We don’t have to learn to bake or make a single thing. Yet, that leaves us feeling a little lost and empty sometimes. Making something with our own hands is in our genetic code.
Creating fulfills our need to make the world better and contribute. It fills our hearts with joy to see people eating that yummy dessert that we made.
Plus, there’s a reason they call it “baking therapy.”
4) Create beautiful custom cakes without having to pay custom cake prices
Custom cakes are expensive. They are worth the money, but if you don’t have to spend the money all the better. It’s also very cool to have your kids make crazy cake requests and you know you can actually make them.
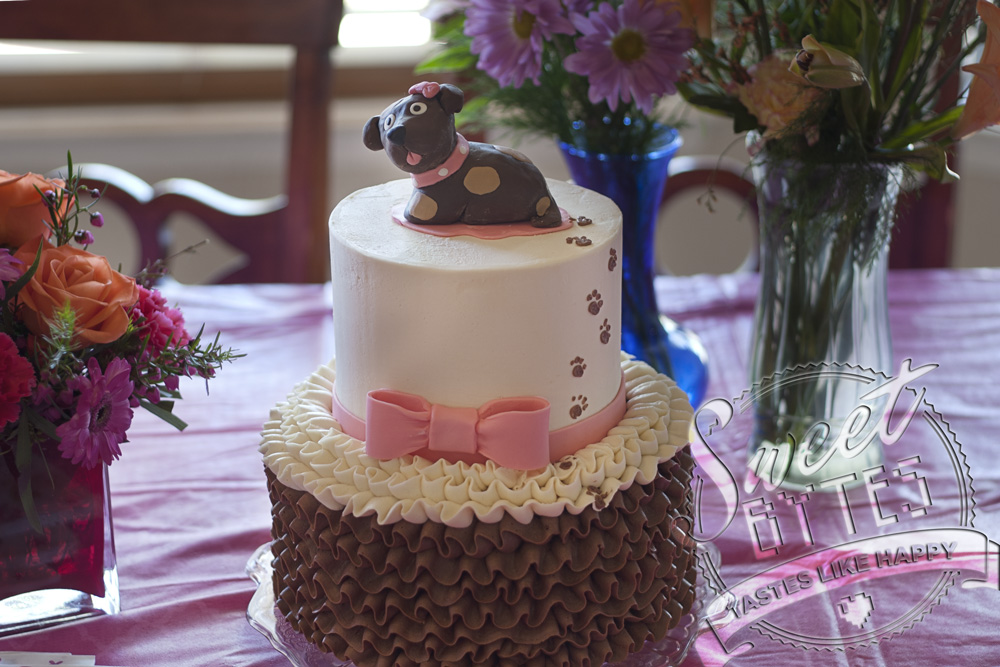
My youngest daughter does her best to come up with crazy flavor combinations like whipped cream chocolate oreo, with cheesecake in the middle and puppy decorations on top just to see if I can be stumped.
So far, I’ve pulled it off every time. 10 points to me!
How to Choose the Right Cake Recipe for You
Knowing if the cake recipe is within your skill level and having all of the equipment needed to make the recipe are the two biggest indicators of whether you’ve found a good recipe to try.
From now on, when you are searching for a good recipe, you can skim down to the instructions first, read the instructions and see what level of difficulty the recipe is before you choose to bake it.
As your skills increase, you won’t think twice about whether or not you can achieve success. You’ll worry far more about how many dishes you will have to wash when you are done! All taste testers must become great dishwashers as part of the job. (It’s in the fine print!)
Cake Recipe Levels of Difficulty:
The difficulty of a cake is determined by the methods used in the recipe. Luckily these are recurring methods and once you master each one, you will be able to feel confident tackling any cake recipe.
You will encounter a lot of different instructions in cake recipes, but you will see that 95% of them will basically follow one of these 4 methods. I can also say with 100% certainty that most cake fails are user errors vs. recipe errors. When you are baking from scratch, you have to be methodical and organized if you want to succeed most of the time.
(Notice I say MOST of the time- we all have cake fails, even the professionals.)
LEVEL 1: One Bowl Cake Recipes
The easiest cake recipes being the “one bowl recipes”. In those, you simply put all of the ingredients into a bowl according to the recipe, stir them up, put the batter in a pan and bake. Not so hard, right?
With a one bowl recipe, accurately measuring the ingredients and following the steps for mixing are essential, just because it’s easy doesn’t mean you can slack off!
A great one to start with is my Chocolate Cake Recipe From Scratch or Red Velvet Cake
LEVEL 2: Cream Method Cake Recipes
The second easiest recipes are the ones that call for the “creaming method”. In those, you cream the softened butter and sugar together first. Next, add the eggs, flavoring, dry and wet ingredients according to the recipe, put the batter in a pan and bake.
Not so hard, right?
My favorite creaming method cake recipes are yellow cake, lemon cake, and Italian Cream Cake. (recipes coming soon!)
LEVEL 3: Reverse Creaming Method Cake Recipes
Next… we get a little more advanced, a bit tricky but still easy if you take it one step at a time.
The “reverse creaming method” recipes start with dry ingredients mixed together in a bowl. Softened butter is added to make a crumbly mixture, then add the wet ingredients according to the recipe. Mix well, put the batter in the pan and bake. Not extremely easy, but still not rocket science, right?
See there, we’ve been through the 3 basic styles of cake recipes and you are not even intimidated a bit.
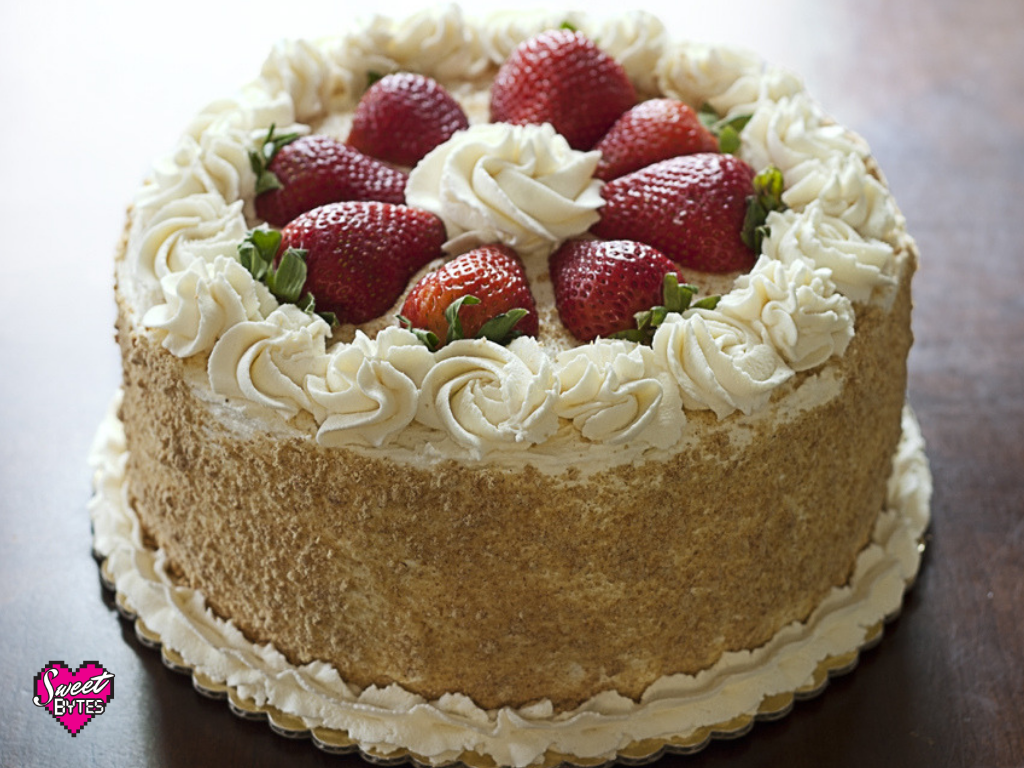
My favorite Strawberries and Cream Cake has a reverse creaming method recipe for the cake part. (more recipes coming soon!)
LEVEL 4: Foam Cake Recipes
The most difficult recipes I have encountered for cakes are those involving foam (AKA whipped eggs whites.) The eggs in the recipe are separated and the whites are whipped to stiff peaks then folded into the finished cake batter according to the recipe.
My favorite German Chocolate Cake, pineapple upside down cake, and Angel Food Cake involve folding in the whipped egg whites. (and.. recipes coming soon!)
When making these types of cakes I highly recommend you separate the eggs when they are still cold and then allow them to come to room temperature. Also, make sure your beaters and the bowl are grease free. This one step will save you a lot of heartache when it comes to achieving stiff peaks with your egg whites.
Most Important Tips to Baking a Successful Cake From Scratch
There are a lot of tips for baking cakes, but these are my tried and true tips that apply to any cake I’m making:
- Read the recipe TWICE!
- Mise en Place. Have all of the ingredients out and measured before you start!
- Don’t substitute ANYTHING the first time you make a recipe- just do what the recipe creator tell you. If you don’t like something go find another recipe. PLEASE don’t play mad scientist on your first try.
- Use the type of flour recommended in the recipe.
- Properly grease the pan. There will be no cake if it doesn’t come out of the pan. (Read 3 Ways to Grease a Cake Pan)
- Preheat the oven and let it get to temperature for at least 15 minutes before you put the cake in
- Don’t overfill the pan! 1/2 – 2/3 full is enough. If you overfill, it won’t bake right and it could overflow into the oven and cause the biggest mess you’ve ever seen.
- It’s done when it’s done. The timer is a suggestion. The cake is done when it’s done- do not take it out or leave it in just because the timer goes off. When you set the times, go for the lowest time and check.
- Wrap your warm layers in plastic wrap and let them cool to room temp, then pop them in the freezer BEFORE you decorate. (How to Store Baked Cake Layers)
Basic Cake Baking Tools and Equipment
In baking, you will find that there is a tool for everything. Some make life easier and some just clutter your kitchen with extra stuff.
Here we will just talk about some of the basics needed to bake a cake. If you want to decorate the cake after that, then you will need more tools for that job.
1. An Oven
The oven needs to be big enough to hold the pans and leave 1” of space in between the pans. The oven should also reach at least 375°F.
You can check out my actual oven here.
2. Cake Pans
Cake pans come in a variety of shapes and sizes and finishes. I like 2” deep, round pans. I’ve used a variety of brands, depths, and finishes, but this is what I use 95% of the time.
My favorite brands of cake pans are Parrish Magic Line and Fat Daddios.
Beware of dark and nonstick finishes because they can change your baking times and temperatures. Plus, there may be health concerns with nonstick coatings in some cases.
9” is the size pan listed on most cake boxes, but any size will work as long as you don’t overfill it with cake batter. Typically I fill my pans 1/2 way if they are 2″ deep and 2/3 if they are deeper pans.
3. A Set of Mixing Bowls
Usually, they are in sets of a large, medium, and small. Glass or stainless steel are both good bets.
I use this Pyrex Mixing Bowl Set which I love because they are very sturdy and come with lids. Plus this Stainless Steel Mixing Bowl Set
, which has every size you need and they can take the stress of heavy use.
I avoid plastic bowls because one time I busted a hole in one while mixing a cake. That day is now recorded as the “cake bowl disaster of 2013.”
We don’t talk about it.
4. Liquid Measuring Cups
The liquid measuring cups are also very nice for heating ingredients in the microwave, holding wet ingredients, and pouring wet ingredients into the bowl.
A set of liquid measuring cups like this OXO Angled Measuring Cup Set would do very nicely.
5. Dry Ingredient Measuring Cups and Measuring Spoons
Dry measuring cups are flat across the top and usually come in a set with 1 cup, 3/4 cup, 1/2 cup, and 1/4 cup.
Measuring spoons are also flat across the top to level ingredients and come in 1 Tablespoon, 1 teaspoon, 1/2 teaspoon, 1/4 teaspoon, and sometimes 1/8 teaspoon.
Stick with one brand because they all can vary slightly and give you different results as you start to get really picky good at baking. I’ve been happier with my steel ones over my other plastic and silicone handled sets.
6. A Handheld mixer
A good handheld mixer is worth the extra dollars. It will last for years and is invaluable even if you have a stand mixer too. In fact, I only had a handheld mixer for the 1st year of running my home bakery.
It’s true that a lot of recipes can be made with only a wooden spoon, there are some techniques that can really benefit from those two mixing beaters.
I’ve had this Hamilton Beach 6 Speed Hand Mixer for the past 3 years. I chose it because it has a reputation for standing up to thick royal icing and I need that for my cake decorating classes.
I’ve dropped it, dragged it all over the state, let my kids use it and it still works like day one!
7. Whisk
Whisks are used for everything from quick mixing some eggs together to making sure you incorporated all of the ingredients. If you get a good set, it will last you all of your years.
I like stainless steel, but silicone is a righteous choice.
8. Mesh strainer or sifter
A lot of recipes call for sifted flour. Sometimes you need to sift all of the dry ingredients together. You can use a mesh strainer or a sifter with a handle. Both will work, the sifter uses less elbow grease. These are the ones I have:
9. Silicone spatula
You will want several of these eventually. There are so handy for scraping the bowls and stirring and it’s a pain to have to clean them between every use on a busy baking day.
They also come in different handle lengths, a scraper style, or a spoon style for different uses. Handy dandy!
“Nice to Have” Cake Baking Tools and Equipment
Here is a list of cake baking equipment that will be nice to have when you are learning how to bake a cake. None of it will keep you from being successful, they are all just convenient.
1. Plastic Wrap
If you are ever going to bake a cake and not decorate/ frost it right away, you will need to have plastic wrap or some sort of airtight method to keep your cake layers fresh. Read more about how to store your cake layers here.
I hate to use plastic wrap, I feel personally responsible for every #noplastic campaign I see. I haven’t found a comparable system for the number of cake layers I end up having at one time.
If you have a viable solution to the amount of plastic wasted by bakers, please let me know!
2. A Small Kitchen Scale
Not every recipe, but a lot of recipes are written using weight only measurements. You don’t want to be left out or have to convert a recipe when weighing ingredients.
Plus, weighing ingredients is more accurate and can make your life SO easy if you have to change the yield of a recipe.
I’ve had this model for the past 5 years and it’s still ticking: AMAZON Link to MY OZERI SCALE
3. A pastry brush or paintbrush dedicated to food only
For cakes, I use my pastry brushes for greasing pans. If you use cooking spray or pan release you won’t need a brush.
I make my own pan grease and paint it into the pans, so I couldn’t do without my pastry brushes. I use them for all of my baked goods in one way or another.
These are the only brushes I’ve found that don’t loose hair and hold up to use over time: Matfer Bourgeat Natural Pastry Brush
Maybe I’m addicted to brushes from my former “life” as an art teacher? Hmmmm.
4. Parchment paper
Parchment paper has multiple uses in the baker’s kitchen, buy a big roll! OR buy it in sheets so you don’t have to fuss with it rolling up on you! grrrr.
For cake baking, parchment paper is invaluable for lining cake pans.
You can also buy precut circles to fit your cake pans, but I only recommend this if you are going to be baking A LOT. As in more than 10 cakes a week. (I just threw that number out there.)
I bought some pre-cut circles in 9″ and 6″ when I started my home bakery 5 years ago. There are STILL so many circles left, that I bet I pass them down to my children in my will.
5. Cake Strips
A secret to baking level cakes is keeping the sides of the cake pan as cool as the center of the cake pan for an even bake. One way to do this is to use Bake Even Strips!
Bake Even Strips are soaked in water then fastened around the cake pan to prevent the sides of the cake from baking faster than the center of the cake! They really work like a charm, are easy to use, and will last for a very long time if you take proper care of them.
You could also lower the baking temperature by 25° and extend your baking time by a few more minutes and get similar results. If you really want to dive deep into flat cake layer read Erin Gardner’s in-depth article over here. In the article, she demonstrates every method I’ve tried over years of baking to get flat cake layers! It will really fast forward your cake education if you hop over and give it a read.
6. Cooling racks
Another of those things that are multi-purpose and you’ll eventually want more than one of and maybe even different types. They have stacking, small, large, etc.
You use them to set your baked goods on while they cool. Their small waffle pattern supports the item while it cools and allows good air circulation for rapid cooling.
7. Covered cake caddy/ cake carrier –
A cake caddy will help you carry your cake around safely and give you a nice airtight place to store your cake after it is sliced.
I like this Sterilite Cake Carrier because it has locks and feels very secure when I am carrying a heavy cake.
8. A Stand Mixer
A stand mixer will change your life. You don’t HAVE to have one though, but having your hands available to do other things is AMAZING. I operated my home bakery for a whole year before I sprung for one, but I will never go back!
For a normal household, the Kitchenaid 4.5 qt. will do perfectly.
If you are thinking of starting a baking business or doing some heavy baking, go bigger. A refurbished 6 or 7 quart mixer doesn’t cost much more than the smaller mixer. I bought a refurbished one 3 years ago, and it’s never had a problem. In fact, I have put it to the heavy, near constant use test many a day!
Common Ingredients in Cake Recipes
As you learn how to bake a cake, you will notice every recipe is slightly different, but most of the ingredients will be similar.
Only the amounts of each ingredient and the method in which they are used changes.
Here we will talk about some very common cake ingredients and their purposes.
1. Baking Powder:
Baking Powder is also used as a leavening, but it has slower reaction times than baking soda. It is called double acting because it goes into action over time as the recipe comes together. Part one is when the liquid mixes with the sodium bicarbonate in the baking powder. Part two happens as the recipe bakes.
Make sure yours is fresh by adding a teaspoon to 1/2 a cup of boiling water, it should fizz. If it doesn’t toss it and buy some new. I also recommend you buy some “aluminum free” baking powder because who wants to eat aluminum?
2. Baking soda:
Baking soda (bicarbonate of soda) is used as a leavening in a lot of cake recipes that have an acidic component like buttermilk or vinegar. It reacts with the acid, produces carbon dioxide which makes air bubbles that get trapped in the batter. Too much baking soda tastes TERRIBLE. Be sure you pay attention to the amounts called for and don’t confuse it with baking POWDER.
Make sure yours is fresh by sprinkling a little on top of a tablespoon of vinegar on a saucer. If it fizzes, it’s good. If it doesn’t react, toss it. Do not use the box you’ve been using to absorb refrigerator odors either or your baking will taste like foul refrigerator odors.
3. Buttermilk:
Buttermilk is a cultured or soured milk that is thicker and tangier than regular milk. It raises the acidity in the recipe and interacts with the leavening. If your recipe calls for buttermilk, don’t substitute plain milk.
Around the internet, there is a lot of advice to “sour” plain milk using a Tablespoon of vinegar OR lemon juice and letting the milk sit for 5-10 minutes.
Other substitutes include 3/4 c of sour cream OR yogurt thinned with 1/4 cup water OR milk.
I’ve never tried either of those and I’m suspect whether the proponents of this advice have tested it in an actual recipe. I think I’ll stick with the advice in this article.
4. Cake Flour:
Typically a cake recipe will call for cake flour. This is a low protein flour that is well suited for cake baking. It will produce tender cake layers with a tighter crumb (IF you do everything else right in the recipe, it’s not magical.)
Some recipes say to use “All Purpose” flour, but I usually go ahead and use the cake flour anyway. If you read on the box of cake flour, it will say to add more when substituting cake flour for all-purpose flour, so I do what it says.
A common Cake Flour Substitute Measure 1 cup of all-purpose flour then take out 2 tablespoons of the All purpose flour and replace the removed all-purpose flour with 2 tablespoons of cornstarch. Then sift that flour 5x’s to get is light and fluffy and ready for action. (This is NOT how they make cake flour, this is just a “common substitute” that many bakers and bloggers use.)
Speaking of sifting, always sift your cake flour, even if you aren’t making a cake flour substitute. It gets a little clumpy.
5. Cocoa Powder:
Cocoa Powder comes up a lot in baking…because chocolate. You will see either Natural Cocoa Powder or Dutch Processed Cocoa Powder. Natural is more acidic and Dutch Processed Cocoa Powder has been processed to reduce the acidity. Dutch Processed Cocoa is also darker.
Dutch processed cocoa will not act or taste the same in a recipe written for natural cocoa powder because it will not perform well with baking soda. Your best bet is to use the right one called for in the recipe. If the recipe doesn’t have baking soda in it, you could get away with using the Dutch, but the taste may differ from the intended recipe.
The taste of cocoa powder can also vary by brand. Just like all chocolate, you can go from inexpensive to extravagant with your cocoa. If I had to choose to spend money, I’d probably not spend it on cocoa powder and save it for the real chocolate used in other items, like ganache.
6. Eggs:
Typically, the cake recipe will call for eggs and not say which size eggs to choose. If it just says “eggs” and no other measurement, go with large eggs and they will work fine.
7. Extract/ Flavoring:
Every cake will have some sort of extract or flavoring or both. Vanilla extract is the most common. It can be found in every supermarket.
There are also emulsion flavorings that add powerful kicks of flavor. Feel free to experiment as your baking skill grow.
As a rule, I avoid imitation extracts and flavors whenever I can because I swear I can taste the “imitation.” Maybe it’s all in my head, but once something is in my head… it’s THERE.
8. Milk:
Many cake recipes call for milk. It’s my policy to use whole fat milk, but many bakers have performed their own studies and say they’ve found no difference in whole, 2% or 1% milk in their cake recipes. I would not let the type of milk I had on hand keep me from baking a cake.
9. Oil:
If there is no butter in the recipe, there will be oil or fat of some sort. I know there are some healthier recipes where applesauce, yogurt etc. are noble substitutes. Try to follow the recipe’s choice of oil.
Do not get fancy with sesame seed oil, olive oil, or something untested or highly flavorful oil unless you are up for your own taste experimenting. Trust me here, just keep it simple and use neutral liquid vegetable oil.
In writing this post, I poked around the internet looking at oil substitutes and what was said about oil, and I will just say that I didn’t find any advice I would follow in the typical “oil subs you have to try style articles.”
10. Salt:
The salt used in recipes usually just says salt. Use a fine grain or what the recipe calls for, but don’t skip it. Even the smallest amount can add great value to the flavor of the baked good and if you’ve made a recipe a few times and you leave it out, you will notice its absence.
Usually, if I come across a recipe asking for a particular brand of salt, I just go with what is in my cabinet and I haven’t found any terrible results from doing so. I very well may be missing out on an enlightening experience in the salt world.
11. Self Rising Flour:
I see a lot of Self Rising Flour used in recipes from the UK and the Southern US. You can definitely find this type of flour in most grocery stores or online. It’s not a specialty item.
Self Rising flour has leavening in it to help the baked good rise. You shouldn’t substitute it for cake flour or all purpose flour because it will throw of the chemistry of your recipe
If you find yourself in a pinch and need to make your own, you can add 1 1/2 teaspoons of baking powder and 1/4 teaspoon of salt to All Purpose Flour and then whisk it together. This might cause you to have to add a little more liquid and may not perform quite as well as the real deal.
12. Shortening:
Some recipes call for added shortening with the butter. Shortening is the chemically hydrogenated version of lard, it’s not available all over the world, but I’ve seen it referred to as Trex, Flora White, Cookeen and Copha.
I use unsalted butter in the place of it despite the fair warnings I have been given that I cannot replicate the texture it gives baked goods, I can’t say I’ve missed it.
13. Softened Butter:
Don’t buy it softened, that would be some butter spread or margarine imposter! Don’t substitute butter or a baby baker will cry real baby baker tears.
Buy sticks of butter and leave it out of the refrigerator for an hour before using it to soften it.
A lot of cake recipes call for softened butter and don’t say “salted or unsalted.” In the United States, the recipe will say UNsalted butter if that’s what they want you to use and just butter if they intend for you to use salted.
In the professional baking/ pastry world, unsalted butter is the more popular choice because then the recipe developer is in control of how much salt added to the recipe. Truthfully, I would just leave out the salt in the recipe if all I had was salted butter. A stick of butter will NOT come between me and my cake. Not today.
14. Sugar:
The sugar called for in cakes is generally granulated white sugar but is called caster sugar, castor sugar, other places. The differences in white sugar are in the grain. Fine, ultra-fine, and baker’s sugar are common in the US and baker’s sugar/ caster sugar has been found to perform better than a harsher grain.
My word of caution is to look for “100% pure cane sugar” and accept no other types of white sugar. If you are looking at unrefined sugar options then those are a whole different thing to be discussed on another post. link when available
There are many other ingredients that will come up in recipes, these are the foundation ingredients that I have found in almost every recipe I have encountered.
Questions and Comments Time!
I would love to know which cake recipes you’d like to see, let me know in the comments.
Did I leave anything out? Not the comment leaving type? Drop me a line instead! I would love to talk cake with you!
Please sign up for our newsletter to stay up to date on all the Delicious News!
Resources used for researching this article:
Ask Nigella: Vegetable Shortening Substitutes
David Lebovitz: Cocoa Powder FAQ
Food52: What is Caster Sugar and Does It Really Make a Difference in Baking
Phys.org: The Difference Baking Soda and Baking Powder