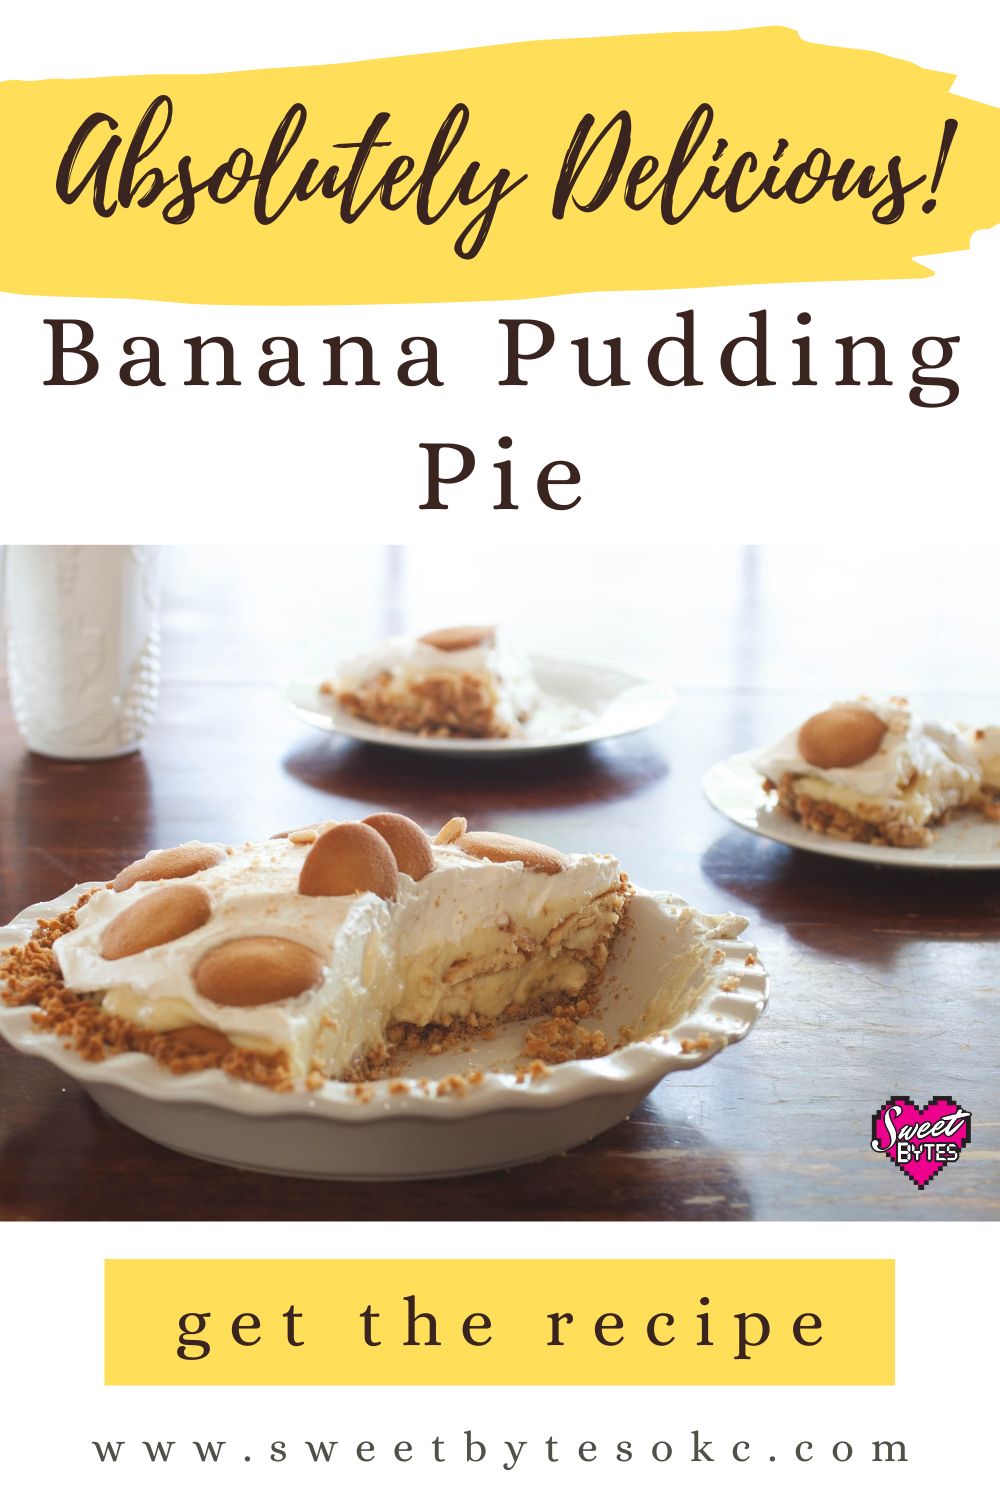
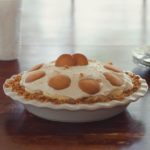
Here’s the BEST recipe for Banana Pudding Pie with vanilla wafers, fresh sliced bananas, homemade vanilla pudding, and topped with real, fresh whipped cream and even more vanilla wafers. It will please any banana pudding fan.
This section contains affiliate links, I earn from purchases made through the links here.
You’ve heard about Banana Cream Pie? Basically, this is like its cute country cousin. Banana Pudding Pie knows how to please the crowd with her southern charm and keep everyone talking about her filling. She’s special, but her secret is a simple and common ingredient: vanilla wafers.
This pie was one of my home bakery’s most requested pies and everyone always wants the recipe! I shared it with you today so that it can become one of your most requested recipes, too.
Jump to RecipeIngredients for Banana Pudding Pie
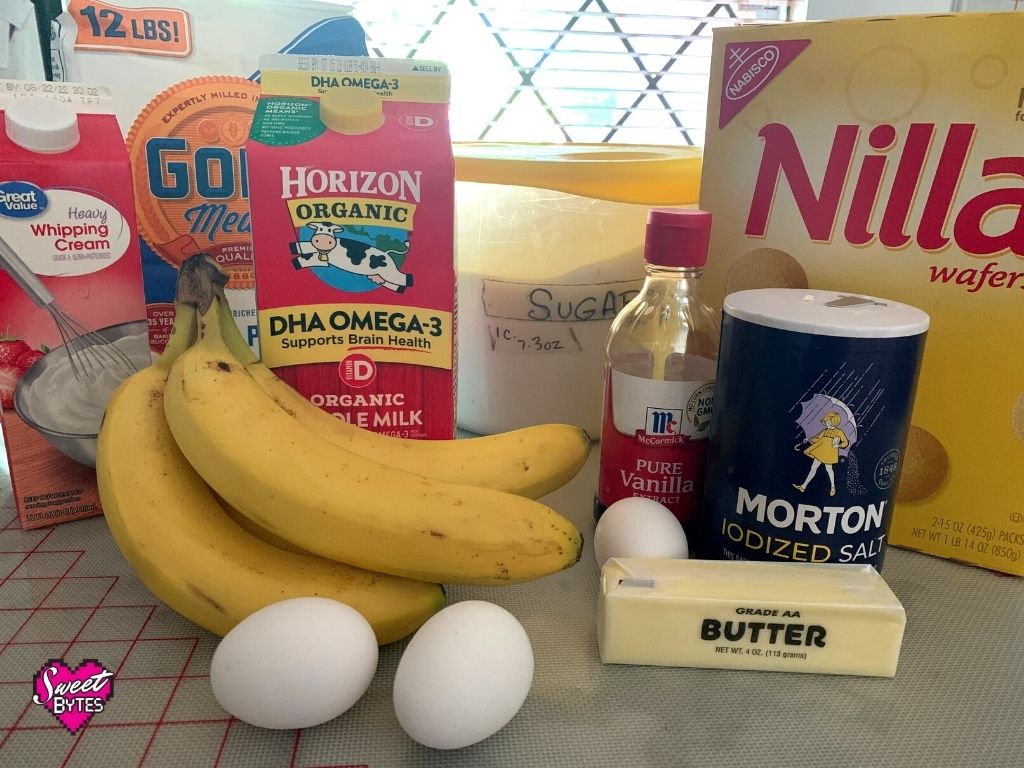
To begin with, gather all of your ingredients. Make sure you have everything you need from the crust to the topping because you don’t want any unhappy surprises to interrupt the pure joy of making this amazing pie.
For the crust:
- Vanilla Wafers
- Butter
Filling:
- Whole Milk
- Heavy Cream
- Sugar
- All Purpose Flour
- Salt
- Egg yolks
- Vanilla
- Butter
The topping:
- Heavy whipping cream
- Powdered sugar
- Powdered milk
- Vanilla
To assemble the pie:
- Bananas
- Vanilla wafers
Equipment Needed for Making the Banana Pudding Pie
Also, you’ll need to make sure that you have all the equipment you need to make the pie. There isn’t speciality equipment needed, but it’s nice to be prepared.
- 9″ Pie plate (I love Le Tauci Pie plates of all sizes- I own 10!)
- Flat-bottomed glass or tamper for pie crust
- Small food processor or gallon zipper style bag for crushing vanilla wafers
- Mixing bowls
- Measuring cups
- Measuring spoons
- 2 quart sauce pan
- Heat proof small bowl for tempering egg yolks
- Silicone spatulas
- Knife for slicing bananas
- Mixer for making whipped cream (hand held is fine)
Make the Vanilla Wafer Pie Crust
Jump to RecipeAnother great thing about this banana dessert is that you only have to bake the crust. In fact, if you are making this pie in the summer and don’t want to heat the house with the oven, you can bake the crust the night before or in the morning while it’s cooler, then make the filling when you are ready to finish the pie.
If you are short on time, you can usually buy a pre-made crust at the grocers. At my store they are in the same aisle with the JELL-O and pudding mixes.
I promise, it’s really easy to make. All you need is to do is melt your butter in the microwave or on the stovetop and crush the vanilla wafers into fine crumbs, mix it all together and press it into the pan.

You can crush the wafers in a food processor, a gallon zipper bag by rolling them with a rolling pin or hitting them with a meat mallet.
Add the crumbs to the melted butter and mix them together with a spatula or fork until there are no dry crumbs left and the mixture will hold together like wet sand.
Next, dump mixture into a 9″ pie plate and press the crumbs into the pan. Press the crumbs into an even layer up the sides of the pan. Funny thing, I use a double shot glass to do this (mainly, because that’s all I had when I started baking and I still prefer it) but they sell tart tampers if you prefer a professional tool.
Make the Homemade Vanilla Pudding
Without reservation, it’s now time to make the most amazing homemade filling for your pie!
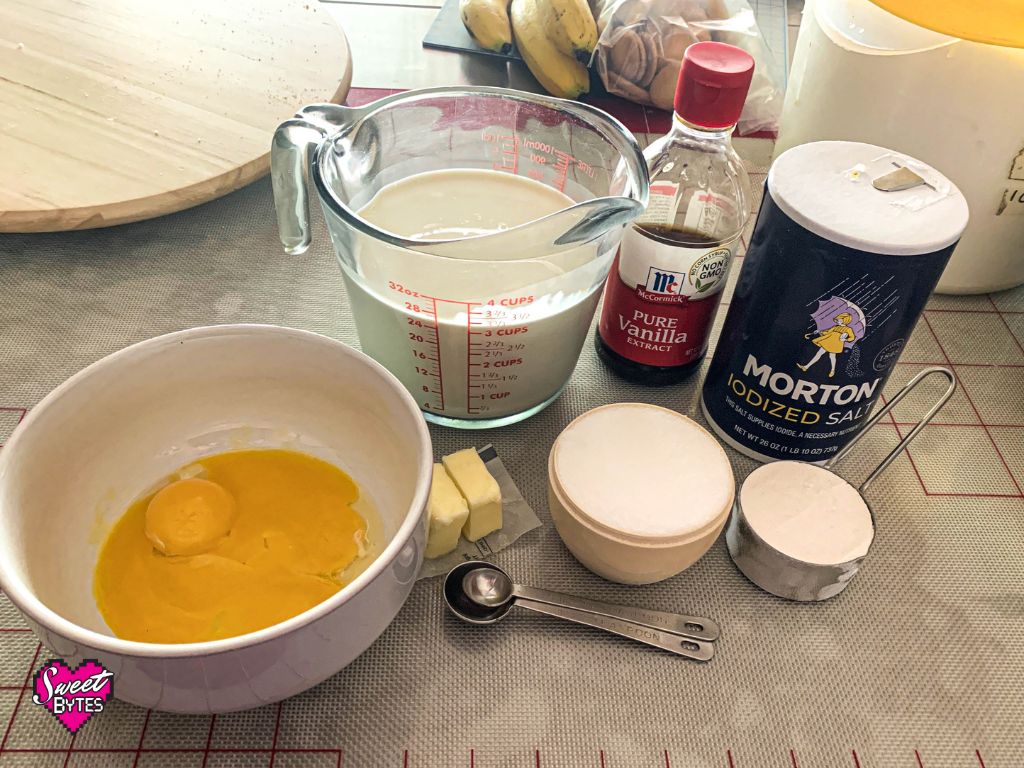
To begin, I measure the sugar, flour, and salt into a small bowl and whisk it all together. Set that aside, and place your egg yolks in a small, heat-proof bowl and whisk them gently to break the yolks. Finally, pour your milk and cream into the saucepan.
Set the saucepan over medium heat, scald the milk. (Scalding means heat just below boiling temperature.) I usually stop when the mixture steams and there are variations in the white color of the surface. Pour the sugar mixture into the milk and stir constantly.
Cook until thickened and bubbling, continue to boil and stir constantly for 2 minutes. Remove the saucepan from the heat.
For the next step, you’ll temper the eggs. The hot custard would could cook the eggs if you skip this step. Slowly pour about a 3/4 cup of the milk into the egg yolks, stirring constantly. I usually pour a tiny amount, then stir, then pour some more instead of pouring a steady stream. The main this is that you slowly heat the egg yolks.
After you’ve tempered the eggs, pour the egg mixture back into the saucepan with the rest of the pudding, return to the medium heat. Stirring constantly to avoid scorching the pudding at the bottom of the pan, continue to stir and cook for 1 minute after the mixture boils. You should have a nice and thick pudding at this point.
Finally, add butter and the vanilla, stir until it’s all incorporated. Transfer the mixture into a dish and cover with plastic wrap to cool for one hour. (I push the mixture through a seive to make it ultra smooth and get out any lumps that may still be in the pudding, but you don’t have to.) Be sure and press the plastic wrap to the surface of the pudding so it doesn’t form a skin. After one hour, transfer the mixture to the refrigerator to cool before assembling the pie.
Make the Whipped Cream
Jump to RecipeThis whipped cream is so good and easy to make, you are going to want to put it on everything. Feel free to double the batch! I have an article all about it if you want to go check it out: How to Make Whipped Cream at Home.
Add all the ingredients for the whipped cream (heavy cream, powdered sugar, vanilla, and powdered milk) into a large mixing bowl or a stand mixer bowl. Then mix with a whisk attachment or regular beaters on your hand mixer on a medium speed until soft peaks form.
I like taking a little longer to mix it on medium because the result is so creamy and it’s harder to mix it too long if I’m going slow.
When it’s perfect, the whipped cream will hold its shape on the end of a spoon and not easily drip off the spoon. Refrigerate until ready to use.
Be careful, do not over beat or you’ll make butter!
Tips for Assembling the Pie
The two main tips are:
- Start with cold filling and a cooled pie crust – The cold filling will keep your bananas from getting cooked or mushy
- Slice your bananas length wise! Slicing the bananas lengthwise (like a banana split) is a great trick from keeping the bananas from turning brown or watery inside the pie.f
After you slice the bananas, place them with the sliced side down on the pie crust. It’s OK if you have to break the slice into smaller pieces to get it to fit. I usually get two whole bananas with a few small gaps. If I have a large space, I sacrifice another banana. The people in my home are always up for eating extra banana. If not, just wrap it up and put it in the freezer for a smoothie or cold treat later.
Spoon a little more than half of the cold vanilla pudding over the top of the bananas. Use a spatula to smooth out the layer of pudding and get it pressed between the bananas. Arrange vanilla wafers on top of the layer of pudding. I usually follow the shape of the pie plate and leave small spaces between the wafers.
Spoon the rest of the pudding on top of the wafers and spread it gently with a spatula almost to the edges of the vanilla wafers. I leave a little of the edges of the wafers showing. I
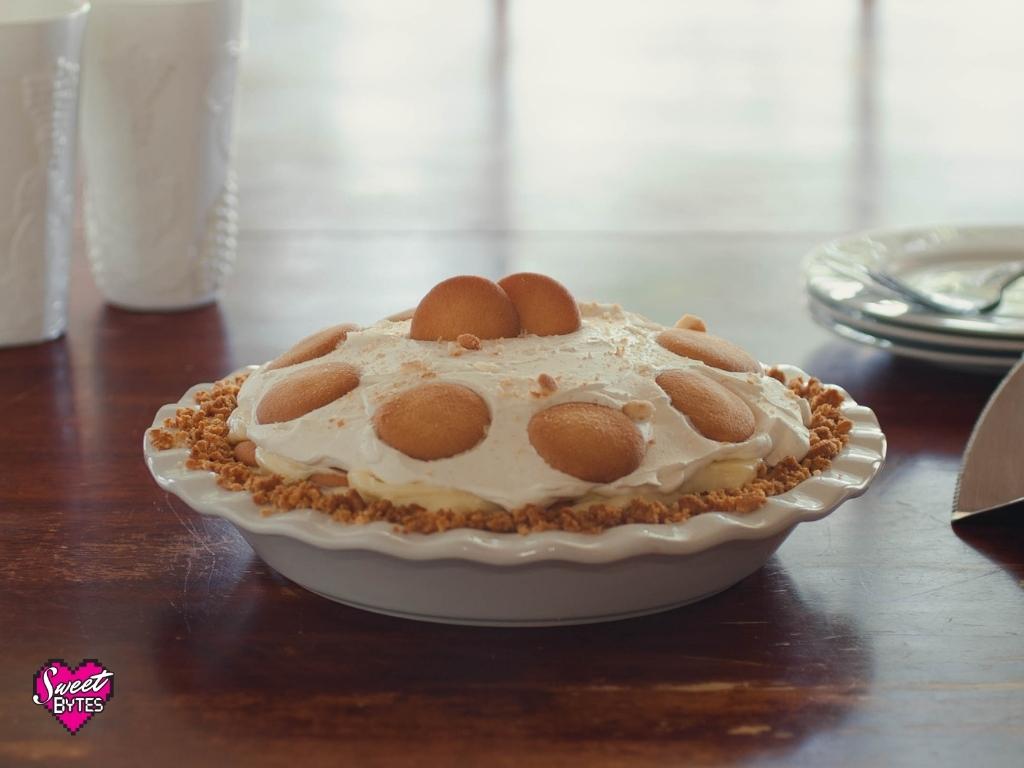
Finally, mound the whipped cream into the center of pie and use an offset spatula to spread the whipped cream to the edges of the top layer of pudding. Make it as fancy or rustic as you like! Then, add more vanilla wafers to the top of the pie. I like to sprinkle some vanilla wafer crumbs on top too, because I’m extra like that.

Storing left over Banana Pudding Pie
Store the pie in a covered cake server tent with foil after it’s cut. The pie is best served within 24 hours of making it and will stay in good shape in the refrigerator for about 3 days. After 3 days, it will still taste good, but it probably will start losing its good looks.
Food safety rules say eat all prepared food or toss within 7 days just to be safe.
The pie is safe at room temperature for 2 hours, refrigerate any leftovers.
Banana Pudding Pie
Here's the BEST recipe for Banana Pudding Pie with vanilla wafers, fresh sliced bananas, homemade vanilla pudding, and topped with real, fresh whipped cream and even more vanilla wafers. It will please any banana pudding fan.
Ingredients
Vanilla Wafer Crust
- ¼ cup butter melted
- 1½ cup vanilla wafers crushed
Filling
- 1½ cup milk 2% or higher
- 1½ cup heavy cream
- ¾ cup sugar
- ⅓ cup all purpose flour
- ¼ teaspoon salt
- 3 egg yolks beaten
- 2 tablespoons butter
- 1 teaspoon vanilla extract
Topping
- 1 cup heavy whipping cream
- ¼ cup powdered sugar
- 2 teaspoons dry powdered milk
Garnish
- 30 vanilla wafers for layers and top
Instructions
Vanilla Wafer Crust
-
Preheat the oven to 350°F
-
Add vanilla wafer crumbs to the melted butter, stir until the mixture looks holds together like we sand.
-
Pour the crumb mixture into a 9" pie plate and use a tamper or flat bottomed glass to press the crumbs into an even layer covering the sides and bottom of the pie plate.
-
Bake for 8-10 minutes or until slightly browned.
-
Cool to room temperature. Cover until ready to assemble the pie.
Vanilla Pudding Filling
-
Mix sugar, flour, and salt in a small bowl, set aside
-
Place egg yolks in small bowl and whisk gently to break yolks, set aside
-
In a saucepan, scald the milk and cream over medium heat.
-
Gradually add the the sugar mixture to the scalded milk, whisking until dissolved.
-
Continue cooking the mixture over medium heat, stirring constantly until thickened. Remove from heat.
-
Temper the egg yolks by slowly stirring approximately ¾c of the hot pudding into the egg yolks. When thoroughly combined, pour the egg mixture back into the saucepan with the rest of the pudding.
-
Over medium heat, stirring constantly, continue cooking the pudding until it reaches a full boil. Boil for 1 minute then remove from heat.
-
Stir in butter and vanilla.
-
Pour the pudding through a wire sieve into a dish. Cover in plastic wrap, pressing wrap to the surface of the pudding. Allow to cool at room temperature for 1 hour then refrigerate until cold and you are ready to assemble the pie.
Whipped Cream
-
Add all ingredients to a large mixing bowl.
-
Mix on medium to medium high until stiffened and holds it's shape on the end of a spoon.
-
Refrigerate until ready to assemble the pie.
Assemble the Pie
-
Slice 2 bananas length wise, arrange pieces, cut side down in the pie crust. It's OK to break the slices into pieces to make them fit. If there are large spaces, cut a 3rd banana lengthwise and use it to fill remaining space.
-
Pour ½ of the pudding on top of the bananas and use a spatula to smooth the pudding over the top of the bananas and into the spaces between the banana pieces.
-
Top the pudding layer with a layer of vanilla wafers.
-
Add the remaining pudding on top of the vanilla wafers, spreading with a spatula to the edges of the wafers.
-
Top the pie with whipped cream and garnish the top of the pie with remaining vanilla wafers and vanilla wafer crumbs.
-
Refrigerate for at least 2 hours before serving.
Recipe Video
Recipe Notes
Store leftovers in the refrigerator, best if eaten within 3 days. Discard after 7 days.
Frequently Asked Questions About Banana Pudding Pie
Q: Can I use vanilla pudding to make banana cream pie or banana pudding pie?
A: Yes, just skip making the vanilla pudding from scratch and use pre-made or a large box of JELLO pudding or its equivalent.
Q: What do I do with the left over egg whites?
A: They store well, so you can keep them in and air tight container in the refrigerator for up to 7 days until you make an omelet or scrambled eggs and add them. Also, use them to make Swiss Meringue Buttercream or Meringues.
Q: Can I use graham crackers/ digestive biscuits to make banana pudding pie?
A: I’m going to say no. They would taste good, it just wouldn’t be traditional banana pudding.
Q: How long can I store banana pie?
A: If you slice the bananas like I suggest, it will last at least 3 days and probably 4.
Q: Does banana cream pie have to be refrigerated?
A: Yes! Do not leave this pie out at room temperature for longer than 2 hours.
Q: How can I keep the vanilla wafers from getting soggy?
A: You can’t. After a few hours, they will get soft, that’s actually some people’s favorite part! Perhaps the best chance of having some crunch is to wait to top the pie with vanilla wafers until you about to serve it.
Questions?
I tried to cover everything, but if you have questions about making this amazing banana pudding pie, please send me an email and I’ll do my best to find you an answer!
I’d really love to stay in touch! Sign up for the newsletter and I’ll send you all the best news and updates from Sweet Bytes on Wednesdays, but only when I have good news to share!