Happy Halloween! I made Halloween Cakes! After racking my brain to figure out what I wanted to make for my Halloween project, I came up with the idea of little trick-or-treater cakes. I had seen the cute little ghost cakes all over the internets, so I thought, “Hey! Why not make a whole group of cake friends.”
This section contains affiliate links, I earn from purchases made through the links here.

I don’t usually do this, but this post is in progress. I wanted to post it, but I still have a lot of process shots to add. Rather than procrastinate and not put up the post, I thought, what the heck, I’ll just keep updating it with more Halloween cake photos as the day goes on!
**Update: I completed it!**
It’s like me right now, perfectly imperfect!
My process of making the Halloween Cakes
This year for my Halloween project I decided I wanted to make a set of mini Halloween Cakes. I got the idea from seeing all of the ghost and Frankenstein cakes on Instagram. I didn’t want to just repeat everything that I have been seeing, but they were so cute…
Then an idea struck and I quickly sketched the set.

After that, I sat on the idea for a week or so. I had to figure out how to make them all work!
(To be continued… I have to go take something to my son’s school! #momlife)
OK! I’m back- didn’t even seem like I was gone, right?
Baking the Halloween Cakes
I struggled a bit, deciding which pan to use. At first, I was thinking my 4″ round Fat Daddio’s pans would be perfect. They would have had to be 4 layers tall to get the right height to width ratio I was looking for, and I decided to go with the Mini Cheesecake Pan with Removable Bottoms and use a Silicone Baking Mat
under it to prevent any leaking.

I also greased the wells of the pan and used parchment circles in the bottom of each well.
One cool thing about these little pans is that the bottoms are removable, which is perfect for cheesecake, but it works really well with cakes and mousses, etc.
I decided to go with my chocolate cake recipe although I knew it was a thin batter and might leak a bit, it worked out and only one lost a tiny amount of batter where I didn’t push the bottom all the way down.

Cupcakes would have worked for this too, but I wanted the sides to be straight up and down.
Level, fill, stack the cake layers
Whenever I decorate a cake, I always level it. Even if the layers look level, they aren’t “level enough” for a decorated cake.
Decorating a cake is sort of like building a house. If you have trouble with it, it’s almost always from the construction and foundation. If you build it right, you can have a lot of freedom in what you do to it.
So I used my trusty little Wilton Cake Leveler, which I’ve had for 2 1/2 years, and I leveled all of the cakes to the same height. It’s been used by many, many students and on many many cakes and it’s still performing like a champ.
For frosting, I went with my vanilla buttercream recipe because my kids love it and it’s so easy to make. For all 6 cakes, I had to use 1.5 recipes to fill and coat them all.
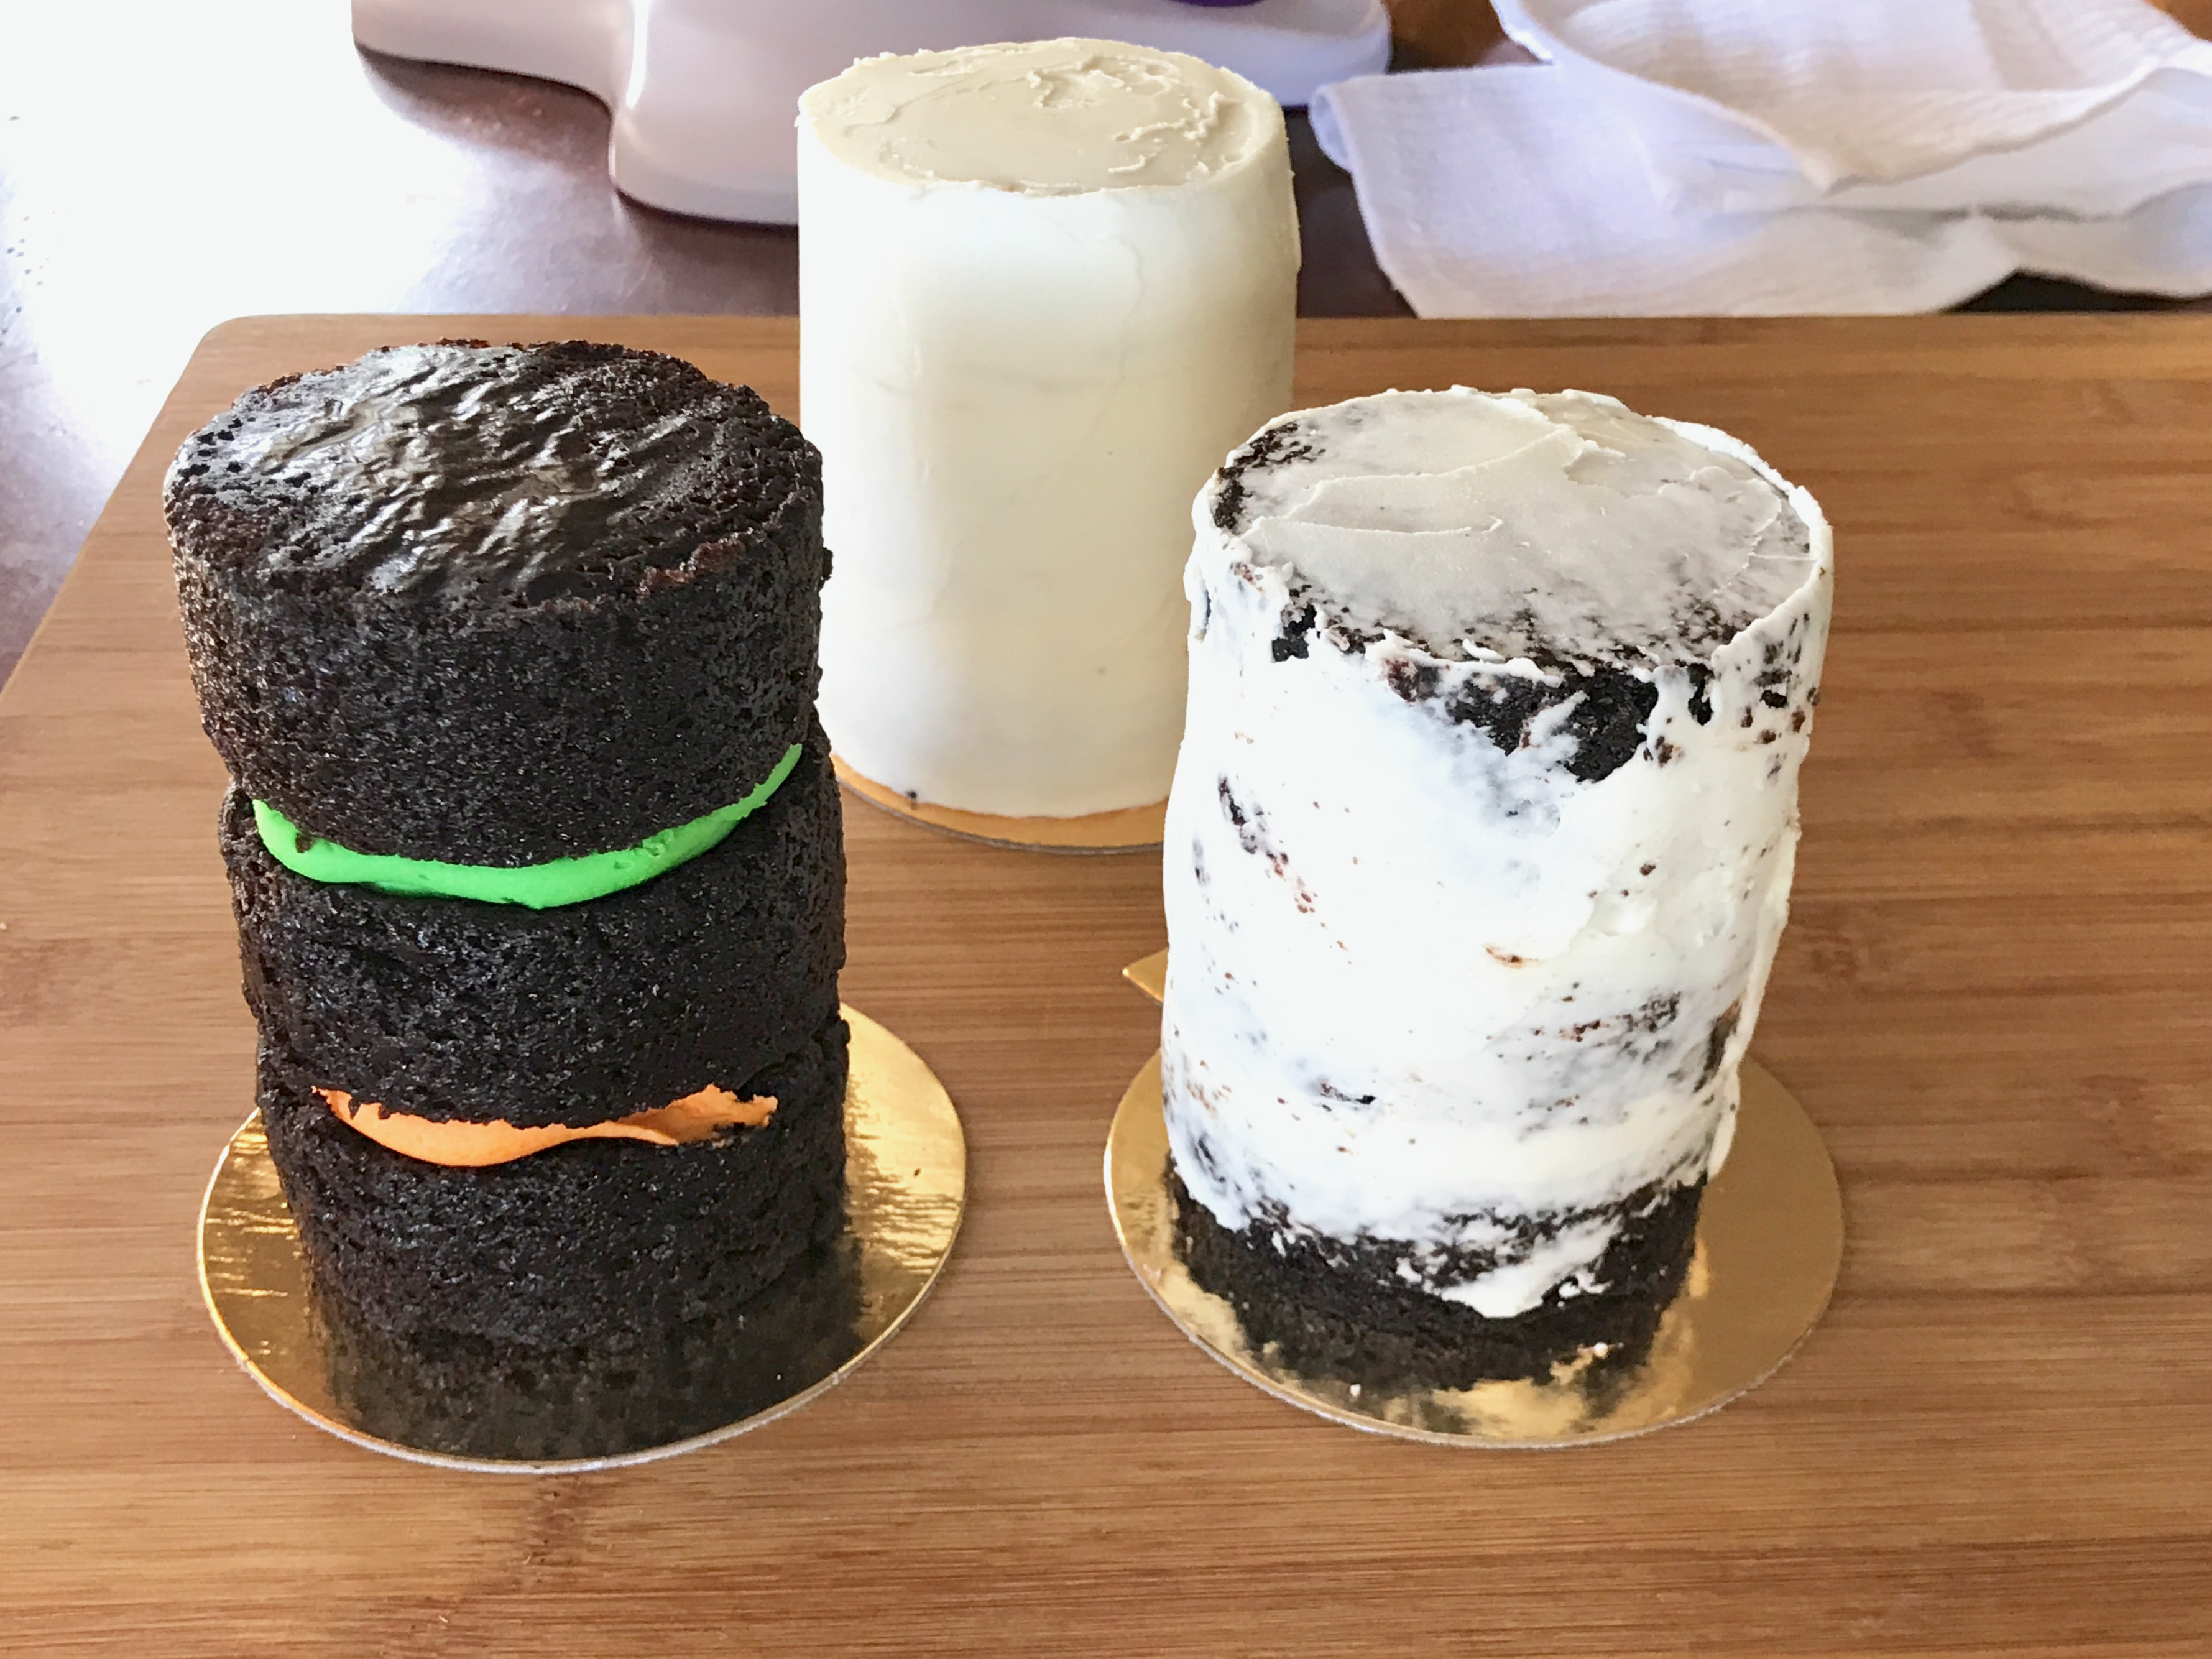
In this pic, you can see I colored the buttercream with orange and green for the filling. I used Wilton Color Right Performance Food Coloring Set because the colors are so bright and it’s easy to achieve vibrant colors with just a few drops.
Even though these were mini cakes, I still did my crumb coat and final coat with a good chill time in between each coat so that I could get them straight. The back cake is almost done in this shot, but for some reason, I didn’t take a pic of a completely ready to fondant one.
Making the fondant accessories
The accessories were made out of fondant with Tylose Powder added. I didn’t measure the tylose powder but sprinkled a little less than 1/4 tsp in my hand with each 2″ ball of fondant I was kneading.

The tylose powder helps the fondant to set/ dry quickly. However, there is a very short work time when using the tylose powder, so keep your unused amounts covered tightly. You could also use modeling chocolate or a 50/50 gumpaste fondant mixture.
The image above might give the impression that I made all of the pieces for the mini cakes in advance, but that’s not the case. The jack-o-lanterns, shoes, unicorn horn, and princess crown needed to dry overnight, so I made them first. I made the hair for each cake as I was ready to use it.
Cake process shots
I got so into making the cakes, that I didn’t think to photograph each cake in the process. I didn’t get any shots of the witch or Dracula while I was making them, which makes me sad because Dracula’s cape is pretty cool.
Working with black is a messy business and it must’ve made me want to avoid touching my camera or having to switch gloves!
To make his cape I rolled out red fondant to 1/16″ thickness- very thin, and then rolled out black to approximately the same size and used my quilting ruler to trim a rectangle to the size for his collar, then another for his cape.
Here are the pictures I took along the way:
This is the ghost trick-or-treater cake. I thought it would look very cute “cake shaped” instead of rounding off the top.

By simply draping a white circle of fondant over the top of the cake and letting it attach in enough places to give it a draped look I was able to make the perfect ghost.
I hand rolled the arms and hands and affixed them with sugar glue, made by dissolving a little white fondant in a little water. To get his eyes the right size, I used a round piping tip as a cutter and cut out the circles from a 1/16″ thin piece of black fondant.

This adorable little princess trick-or-treater cake is a little bit heavy on the fondant, but I couldn’t resist making each little bouncy curl. The fondant isn’t really meant to be eaten, you can just pull it off to get the yummy frosted cake underneath!
Each pleat in the princess’s dress is a separate piece of fondant that I folded gently. The top of her dress is a premeasured rectangle of fondant wrapped around and seamed in the back.
The sleeves and arms are hand-rolled and sugar-glued to her sides.

I didn’t get many process shots after these two. You can see how I used the toothpicks to hold the shape in the bottom of the unicorn’s dress. I also marbled together pink, violet, light blue, and some white to achieve the colors.
Since this was a creative project that wasn’t for a client, I worked more like I would in the art studio. If something went wrong, I took it apart and tried again. If I got frustrated, I put that particular cake up for a while and worked on something else.
The only cake that I ended up disappointed was the unicorn. She was the one I was most excited about starting the process, so I saved her for last. When I started working on her mane, I just feel like I let myself add too many colors and it just looks crazy.
If I did it again, I would stick to the typical unicorn cake look or just a white mane with colorful flowers.
Some finished pictures of the Halloween cakes
Each cake is approximately 4″ high and 3″ across. I kept them in the refrigerator for stability, when I removed them, they did condensate from the change in temperature, I just left them out under a fan so they could come to room temperature.
You can see the colors didn’t run and the sculpted pieces all held their shape.

Tools and materials I used
For fondant, I used all of the brands that I had laying around. I had some LMF Fondant that I made and can 100% vouch for it’s awesomeness and taste. I went and bought some black Wilton fondant. In addition, I already had red and purple Fondarific fondant and a sample of Mona Lisa Fondant that I got at a workshop.
I drew Frankenstein’s scars using Gourmet Writer Food Decorator Pens. I keep them in their original zipper bag and keep that in another Ziploc freezer bag. I’ve had the same set for 2 years and they haven’t dried out. I’ve seen people say their markers always dry out, but I can’t imagine why they are drying out like that.
For sculpting tools, I used my Innovative Sugarworks Sugar Shapers. I really and truly love these tools with all my heart. I have the firm, soft, and mini sets in both. They are not cheap, but I know they will last a lifetime and I use the heck out of them.
Plus, I have regular clay pottery tools that I have bought just to use on my desserts because they were my first sculpting loves and I am used to them.
Questions or comments?
I hope you enjoyed this little peek into my process. Being an artist, it’s really easy to get into create mode and forget to document the process and progress. I will try to be more aware of the ways that I can share with you as I grow as a writer/ blogger.
In the meantime, please feel free to ask me any questions you have in the comments below or send me an email and I will get back with you as soon as I can!
Let’s also stay in touch, sign up for the Delicious News and I’ll send you all the updates, recipes, and adventures in sugar!