If you’ve never made a fresh pumpkin pie and you’re ready to give it a try, this article will walk you through everything you need to know about how to cook pumpkin for pie. Get ready to have the best tasting, freshest pumpkin pie ever!
This post contains affiliate links, I earn from qualifying purchases.

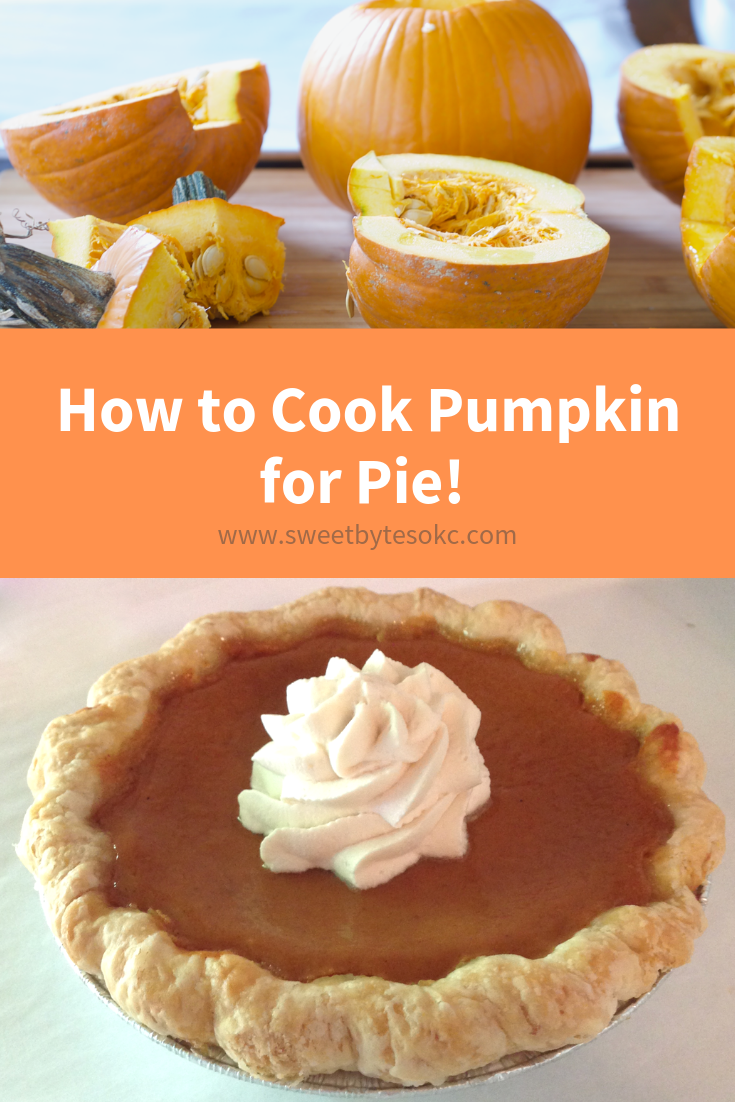
How to choose the best pumpkin
There are plenty of people out there who say it doesn’t matter what type of pumpkin you use for your pumpkin pie, but I beg to differ. The more fresh pumpkin pies you make (and eat) the more choosy you will get with what type of pie pumpkin you prefer.
This video walks you through how to choose a pumpkin for your pie and what to watch out for.
One thing she doesn’t address is the weight of the pumpkin. Our guy at the farmer’s market explained to us that the pumpkins that are heavier than they look are the ones with a good amount of fruit to use. The lighter ones are filled with stuff you just have to scrape out.
After you pick your pumpkin, you’re ready for the next step! We got ours, maybe a few more than you’ll need!

How many pumpkins do you need to make a pie?
Usually, one sugar pie pumpkin will make a pie with about one cup leftover. BUT I always bake at least two pumpkins just in case there wasn’t enough. When you are making fresh puree, you don’t want to come up short.
Making homemade pumpkin puree
Making pumpkin puree is easy as pie. The hardest part is getting the water out of the puree and even that is easy.
Equipment and tools needed
Good tools are always helpful in getting the job done. I’m going to link to my favorites as I list what you need to cook pumpkin for pie.
- Sharp knife suitable for cutting a pumpkin in half
- Large spoon or the pumpkin scoop
tool from the Halloween kit
- Baking sheet
- Oven
- Food processor
or a potato masher
- Spatula
- Natural cheesecloth
Process for preparing the pumpkin for a pie
- Cut the stems off of the top of the pumpkin. I cut a hole around the stem and then pull it off. Sort of like making a lid in a jack-o-lantern but stay closer to the stem.
- Cut each pumpkin in half.

- Scoop out the seeds and stringy pulp using the side of a metal spoon or the pumpkin scraper. Leave the smooth inside walls of the pumpkin intact.
TIP: If you are going to save the seeds for planting or roasting, use a gloved hand to pull them out BEFORE scraping the pulp out. The pumpkin does the work to hold the pulp in place and the seeds come out easily!
- Place pumpkins cut side down on a foil or parchment covered baking sheet. Cover the sheet so there is less mess to clean after the baking.

How to cook pumpkin for pie
- Bake in the oven on 375°F for approximately 45 minutes. The pumpkins will look softer and you can easily poke them with a fork.
- Remove the baking sheets from the oven and allow to cool for about an hour so the pumpkins are easy to handle.

That’s it. Easy peasy.
How to make the pumpkin puree
- After the pumpkins are cool, trim any burnt or over brown pieces off of the rim of pumpkin and discard it.
- Scoop the fruit of the pumpkin into a large bowl. Sometimes the pumpkin just falls right out into the bowl, sometimes you have to give it a little scooping.
- If you are tired (like I always am after all that), cover the bowl, place it in the refrigerator, and do the next part tomorrow.
- If you are not tired (because you have more energy than I do), get out the food processor and fill to the max line with your scooped pumpkin and puree until it’s smooth. You can also use a potato masher to do this and get an arm workout at the same time!
- After the pumpkin is pureed, you can put it in a bowl until you are ready for the next step.
Here’s an excellent demonstration from Iowa Public Television on exactly how to make pumpkin puree using a food processor.
Removing the excess water from the fresh pumpkin puree
When you cook pumpkin for pie there is naturally a lot of water in the pumpkin. If you use the pumpkin without straining it, it will add more liquid than actual fruit to the recipe. That would be bad.
When you buy canned puree, they have already taken the excess water out for you. I am always surprised at just how much liquid I get out of the puree!
- Prepare your cheesecloth. When I buy it, it comes folded into a long rectangle. I carefully unfold it. (Be careful, it’s bigger than you think and you don’t want it to drag on the ground.) Then, refold it into a square that that is about 12″ wide down from the original 36″.
- Lay the cheesecloth on your baking sheet, still folded into the square.
- Plop some pumpkin onto the center of the cheesecloth. (Do you say “plop”? Do people in other places even use the word “plop”?)

- Pull up the corners and sides of the cheesecloth so that it looks like a stork’s baby bundle. Twist it closed, like a bread wrapper.

- You need to be close to the sink or where ever you are going to be straining out the juice. As soon as you pick up the pumpkin, the juice starts coming out.
- Lift this bundle of pumpkin up and over the sink. Gently squeeze it from the top and allow the juice to strain out. If you get impatient and squeeze too hard, the puree with force itself through the cheesecloth and make an aggravating pumpkin escape hole. Be patient.
via GIPHY - As the bundle loses juice, it will get more compact. Gently squeeze the bottoms and sides until the juice slows to a few drips.
Storing Pumpkin Puree
After most of the juice is removed, put the bundle back on the baking sheet and open it. Use a silicone spatula to scrape the strained puree off of the cheesecloth and into the storage container of your choice. If you are saving space, a zip freezer bag works great because they can store flat in the fridge or freezer.
The puree can stay in the refrigerator for up to 7 days and store in the freezer for several months as long as it’s in an airtight container.
Super Secret Step
I tend to get a bit obsessive about textures and bits in pies. So I do one more step.
Most sane people would probably skip this one, but here’s what I do:
I push all of the puree through a fine mesh stainless steel strainer with a silicone spatula. This is quite tedious, but it gets any little lumps, strings, or bits of pumpkin flesh out of the puree. My puree is SMOOTH… and my hand is SORE.
Ready to make pie
Typically, a can of pumpkin is 15 ounces. A lot of recipes that have pumpkin puree have been formulated to accommodate this amount. Because of this, I measure out the pumpkin puree into 15-ounce portions so that I have it ready for whatever recipe I decide to make!

This isn’t just pumpkin for pie. Fresh pumpkin puree is great for all of your pumpkin needs!
Any questions or comments?
Leave a comment below or send me an email and let me know if you are going to try making your own pumpkin for pie!
Sweet Bytes Pumpkin Pie Recipe is coming SOON!