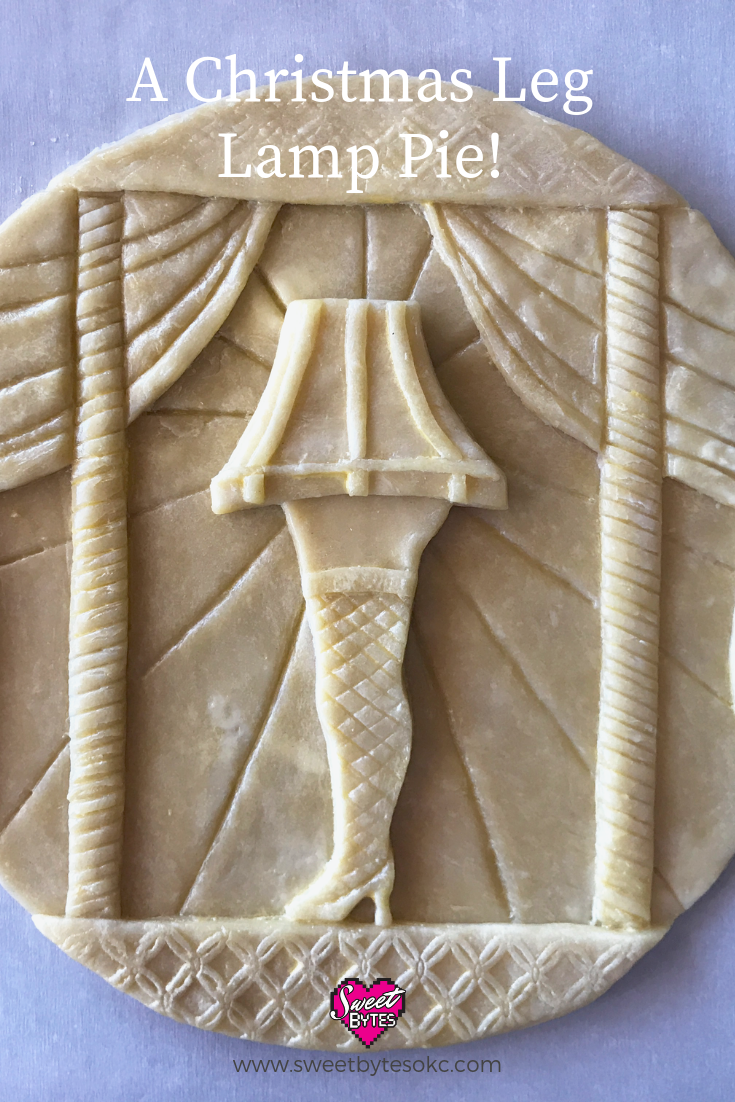
This year Christmas pie baking inspiration hit me and I knew I had to make A Christmas Story Leg Lamp pie! That movie is one of my family’s very most favorite Christmas movies.
We even traveled across the country to go an visit A Christmas Story House, which is Ralphie’s actual HOUSE from the movie. The people who bought it have lovingly restored the entire house, matching all of the scenes from the movie. If you are a fan, go see it… right now… Just go!
This post contains affiliate links, I earn from qualifying purchases.
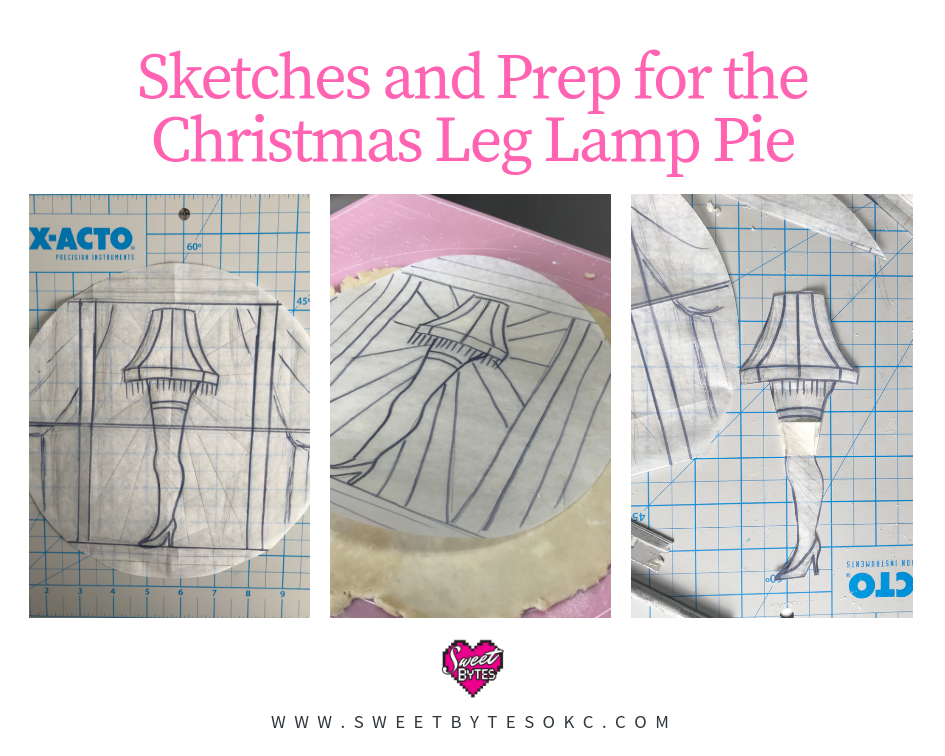
Beginning the Christmas pie sketches
Back to the Christmas pie. I knew exactly what I wanted it to look like right away. It’s so nice when the ideas just zap into my head already finished! I don’t have to screw them up by thinking too hard or doubting myself, it’s amazing how it all works out sometimes!
The first thing I did was decide what size the pie had to be. I went with a 9″ round and then began sketching out my designs.
Side note: making something like this doesn’t come together for me in an hour or two. I worked on this pie for 5 days, a few hours each day from start to finish. I could have pushed it all into 2 days, but that would have been my life for those 2 days, and it’s holiday time and that wouldn’t have been very fun for the rest of my family.
Instead of working in my sketchbook, I drew it out the image of the leg lamp pie on a 9″ parchment circle. (I have a ton of those for cake decorating, but they come in very handy for pie making too!)
As I worked, I had some trouble getting the curtains to translate visually. After trying a few options, I decided to pull them back in the traditional curtain swaggy look so everyone would interpret them visually as curtains.
Making a base for the leg lamp pie crust
I started with my favorite pie crust recipe, which I wrote all about in this article: Truly the Best Pie Crust Recipe. I made the pie crust recipe the day before I was ready to start working because it behaves much nicer if it has had a good long rest in the refrigerator.
To begin, I rolled out my crust, big enough to cut out a 9″ circle and approximately 1/16th of an inch thick. With so much layering going on top of it, I needed it to be slightly thinner than I would normally roll for a top lid.
For precision, I used my Wilton fondant rolling pin with the guides. I used this pin instead of my JosephJoseph pin because it can roll out very thin layers that are usually reserved for fondant and sugar work.
Next, I used a 9″ cake cardboard cake circle as my template for cutting out the circle and placed the pie crust circle on top of that same cake circle for support during the making of the rest of the Christmas pie.
Adding the details
I used my sketch as the template for making the individual pieces of the pie crust design. By cutting apart the sketch and cutting out the corresponding crust pieces then arranging them on the circle of pie crust, it all came together.
I used my fat daddios knife when I was cutting on top of my silicone pastry mat, and a straight razor blade, and an X-acto knife to cut out the crust after I moved it onto my cutting board.
For the “glue”, plain water and a small paintbrush were all I used to adhere the pieces together.
Working on one section at a time, I made sure everything fit properly and corrected the details that needed adjusting. For example, the leg lamp in the sketch ended up being too tall for the final design so I had to do surgery on the thigh to make her fit properly. All’s well that ends well, right?

My favorite part of the whole thing was using my Sugar Shapers to create the fine detail. They work so well, I love them dearly. Mostly, I used the hard tipped ones because they are perfect for pushing into the cold pie dough and creating the relief style sculpting.
I also used a silicone mold to make the impressions on the two vertical posts and the top and bottom panels where the texture is. I didn’t take any pictures of the process because I did it as an afterthought. Silicone molds are wonderful to have on hand because they are so handy like that. Really, anything that can be pressed into the crust can make a good texture.

Baking the pie
Deciding on the flavor of the pie was more difficult than deciding on the design! I fretted over what would bake with a nice even top and not destroy the decorative crust. Finally, landed on pineapple pie to pay homage to the humungous fruit basket Ralpie buys his teacher, Miss Shields, in the movie.
However, I ran into trouble with the pineapple pie filling. There wasn’t enough to fill the crust as high as I needed! Sheesh.
When I baked the first one, the decorative sides of the bottom crust fell into the filling! GAH! I ended up making the pineapple pie twice and adding in a trip to the store for more pineapples. Insert all the bad words HERE.
Moral of the story is don’t experiment when experimenting. If I had just used one of my tried and true recipes, I wouldn’t have had so much baking trouble.
As I was working with the pineapple pie, I developed trust issues. I didn’t trust it enough to lay my leg lamp pie crust on top and just bake it all together. By baking the top crust separately, I made sure that no matter what went on with the actual pie, the decorative top crust would stay nice.
I baked the top crust on a baking sheet lined with parchment paper. I baked the pineapple pie separately according to the pie recipe’s instructions. When the pie was in the last 5 minutes of baking, I laid the pie crust on top using my Wilton Cake Lifter and let it all finish baking together.

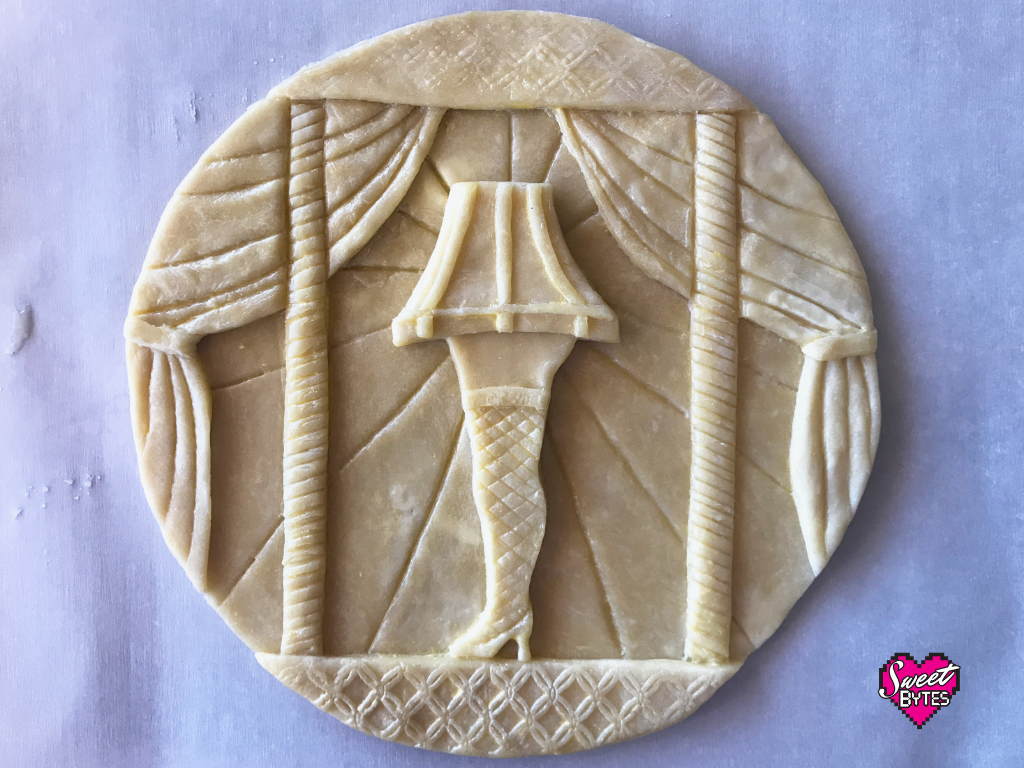
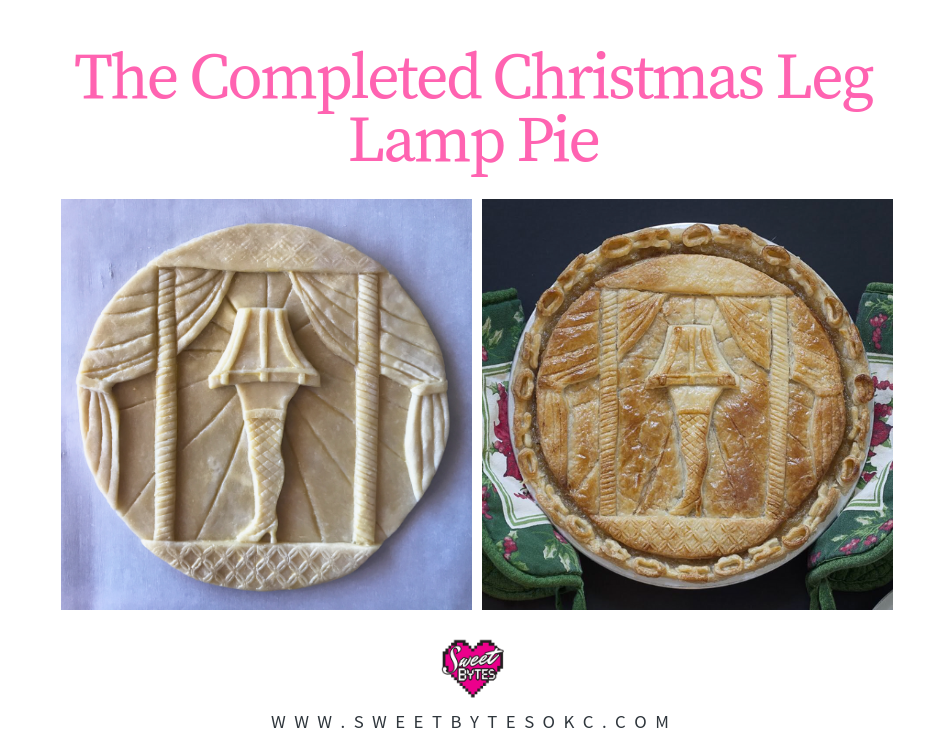
Presenting A Christmas Story Leg Lamp Pie!
Finally finished! She got a little more browned in spots than I would have liked. Also, the “ho ho ho” parts didn’t stay put as well as I would have liked. All in all, considering it’s art made of butter and flour, I’ll take it. Maybe I’ll revisit this design again one year to perfect it.
I never get tired of the leg lamp. In real life, I think I would have felt just like the mom in the movie though. I too would have used up all the glue on purpose!
Did you know you can buy A Christmas Story House Leg Lamp of your own? One day, she will be mine. For now, I have pie.
Questions or comments?
Please feel free to ask me any questions you have! Send an email or leave a comment and I’ll get back with you ASAP. Making decorative pies is a lot of fun. If you make one of your own, be sure and tag @sweetbytesokc in the picture!